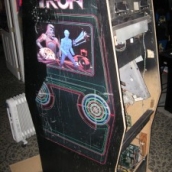
Tron
Manufactured by Bally Midway (c)1982
|
Condition When Purchased:
|
D-
|
|
Current Condition:
|
A
|
Tron is a game that I really didn't plan on ever owning. While it's a game that I did grow up with, so there IS the nostalgia association, and I actually DO like the game itself (and being that it seems about half the people out there love and half the people hate the actual gameplay), the reasoning for me that I'd never own a Tron was the simple fact that the game requires… no, DEMANDS to be a fully res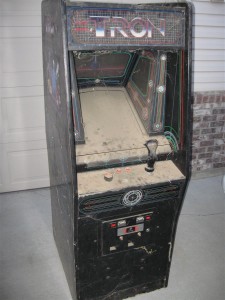 tored beauty and the artwork alone for the game will set you back a pretty penny. I was offered a "C+ / B-" working machine a few years ago for a good price, but it would have still cost a fortune to restore on top of the price of purchase. The only way I would have EVER considered owning a Tron is if I could get a project for free or super cheap. I managed to acquire such a project, for $50.00. Evidently that was cheap enough.
Obviously a $50.00 Tron isn't going to be in the best of shape, and this $50.00 Tron is no exception. It was dirty as hell having come from a barn (along with a couple other projects I picked up). It had bird-crap on it, mouse crap in it, not to mention a number of mud-wasp nests still attached to various parts of the cabinet. Luckily when I picked the game up, it was during the win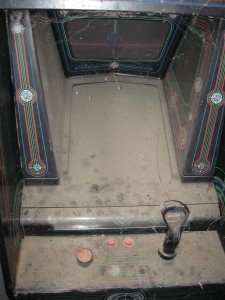 ter and there were no signs the wasps that created the little mud nests were home. Nor were any of the other critters that once resided or at least passed through the cabinet while it was stored in the barn (thankfully).
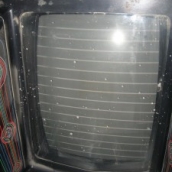
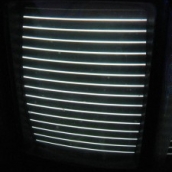
The first thing I did when I got it home was to sweep and vacuum it out while it was still on my driveway. Once I was confident enough there were no critters of any sort still in the cabinet I wheeled it in and gave it a bath. It's simply AMAZING how much better the game looked with a simple wipe-down. Hell, it's condition improved a full grade with just a bath. Being the impatient kind of guy I am (plus I am a little daring) I plugged her in to see what would come up. I was pleased to see that the monitor actually worked! Unfortunately (and expectedly) the PCB didn't. What I got on screen was multiple lines across the screen vertically. Or so I thought it didn't work. I powered down and wiggled/reseated connectors and what not… and fired it up again. I got the same lines. Check ing the voltage it appeared that was likely the issue as +5 voltage was at 4.75 or so. I attempted to turn the voltage up on the power supply PCB but it was maxed out. I fired it up again and got the same lines… but evidently I got distracted and I left power running. After about 2 minutes I hear a POP and static… I look and… I see TRON! The game was alive! It did have some sprite issues but the game WORKED. I pushed P1 and the game fired up. The stick only worked in 3 directions and the spinner was erratic but… IT WORKED! Needless to say, I was quite stoked (and very surprised).
After some diagnosis I determined the game would consistently start after a 1-2 minute warm-up period. There were some minor issues with a few sprites. I was only getting sound out of one channel… the other channel only offered up "pop" sounds when differing sounds were supposed to fire. The "down" direction wasn't working, and the spinner was erratic. The +5 voltage was still low as well. Upon checking the power supply board I found a bunch of corrosion. After some debate I decided to go with an Arcade Shop switcher converter rather than rebuild the original supply. I still do have the original supply and may tackle rebuilding it one day when I am really bored. I was HOPING replacing the power supply would rectify at least a couple of my issues… unfortunately replacing the power supply only rectified the warm-up period issue with the old supply. The game now did fire up as normal. The sound issue and sprite issues remained. By this time though I'd already fixed the down control issue (bad connection at the PCB), and fixed the spinner issue (reflowing all solder joints on the spinner PCB or it could have been the new connector I added as I did both at the same time … this after failing with trying another PCB that I got off a local for free that was untested). Unfortunately the sprite issue and the sound issue were beyond my capabilities and I sent the board out to be fixed by a fellow KLOV member.
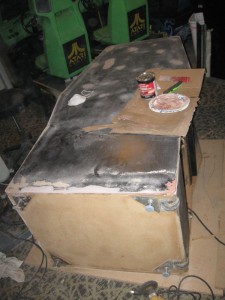
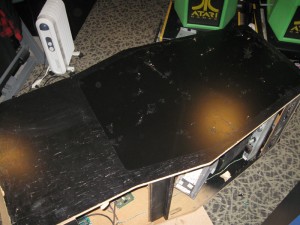 While the PCB set was out being worked on I figured I'd take that time to restore the cabinet. It just so happens that my wife and boy were visiting grandma in San Diego for a couple weeks so it was a perfect time to dedicate the time necessary to get `er done. After ordering an (almost) complete Tron art set from Phoenix arcade (I did not replace the monitor shroud artwork or marquee, but everything else was ordered, side art, CPO, front CP art, above the CP art, inside side art, etc.). I also ordered a repro Tron joystick handle from www.groovygamegear.com. While I was waiting for the art to arrive I prepped and painted the cabinet. I've mentioned in other blog posts just how much I despise sanding… and, well, that didn't change with this project. Sanding sucks. Period. But I got through it with little issue. I did have a number of places I needed ot use some bondo to fill in areas. The front left corner, for example, was a little chopped up and needed help, but nothing earth shattering.
After prepping it was time for paint. I went with my usual routine of Kills primer then black oil based paint applied with a fine foam roller. While I wish I had a spray booth and equipment, I don't… and I've found over the years that this is the next best method to to get a nice finish. I usually roll at least two coats of black, sometimes three.  During this time my parts/art started to arrive in the mail. I also received word that the PCB set was up and running as normal and was on it's way back home. After letting the final coat dry for 4 days I begin installing the various pieces of art. You want to always let your paint dry a minimum of 72 hours before applying side art as the paint does outgas and if you apply your art too soon you will get bubbles in the art. If this happens, the best way to handle it is to use a needle to pop those bubbles and press the gas out. But the easiest way to handle this situation is to not apply your art for at least 72 hours.
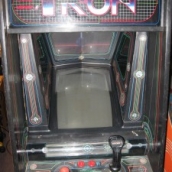
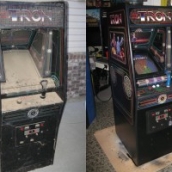
Once the artwork installation process began it was really only a couple hours between the time when the cabinet looked like it did in the photo to the left and how it looks today. By now, installing artwork has become a pretty simple process for me (even full side art which this cabinet does not use (but close enough). Having my biggest screw-up happen when attempting to use the "wet" method of application for the first (and only) time, I always use the "dry" method. I find the easiest way to handle this is to position the artwork and tape it down securely with blue painters tape. I then unsecure and roll down the top 8"-10" or so of the artwork and remove the backing of about 4" of it, cutting the removed backing off. I take a final assessment of position and modify as necessary and then apply the top 4" or so. I then remove all the blue painters tape from the remainder of the art, lift and start removing the remaining backing from the area I cut down, making sure to press/slide from the middle to the edges as I go down in an effort to remove as much air as possible. Some use a credit card… some use a Squeegee… I ususally use my hand (though I do have a squeegee on hand if I need it). I work my way to the end and then check for air bubbles. Any air bubbles are handled immediately (sometimes a needle is necessary, often times they can be worked out). The results speak for themselves.
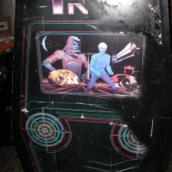
This cabinet, having a number of unique artwork pieces, took a little longer than usual. The inside side artwork was exceptionally difficult to line up correctly. The front and upper control panel artwork had to be installed. And of course the control panel overlay itself needed to be installed. I also didn't have RED buttons at the time (an oversight) so I had to go with white (I have since purchased two red and two translucent red buttons, though I have yet to install either set. I will one day). When all was said and done I w as pretty happy with the cabinet… but something seemed a little off with the side art. After looking online at a number of different sets I determined there was something wrong… the blue coloring wasn't quite "right". After discussing the issue with Darin, it was determined that I got a less than "perfect" set of side art and he immediately sent out a new set. Unfortunately the current set was already applied and after much back and forth I decided to leave it on. It's not "bad" by any stretch, but just not "awesome"… but I don't want to risk having to re-sand and re-paint the sides in an attempt to remove this art. I decided to keep the proper side art and if I ever sell the cabinet, the art will go with it. Such is life, but it's the sole reason why I score this cabinet an "A" rather than an "A+". The PCB set arrived before I finished the cabinet up and once it went it, life was good. It worked perfectly, though I still get an odd "static" noise if I leave the game running in attract mode. Many people have mentioned this issue but no one seems to have a definitive answer on how to rectify it. I rebuilt the amp, but that didn't work. Maybe its a connector issue? Who knows. All i know is that while playing it sounds great… and the minor static sounds during attract are usually drowned out by all the other games running around it. I am sure I will tackle the issue again… probably the same time I swap out buttons. But for now, she's in her new home to stay.
More Photos:

