Warlords (Upright)
Game manufactured by Atari © 1980
| Condition When Purchased: | B |
| Current Condition: | A |
 While browsing the local Craigslist a few days before Christmas of 2016 I came across a listing for what appeared to be a very nice looking upright Warlords for sale less than 5 miles from my home. I really wasn’t looking for another machine, but being that it’s a classic, and by all appearances looked to be in very nice shape, I figured it was certainly worth a look. Especially since the price was right ($300). The ad was posted around 10PM and I managed to run across it only 20 minutes later, and they’d asked for a phone call, so against my better judgment, I called. A lady answered the phone, I apologized for calling so late. She wasn’t upset at all (thankfully). I explained to her that I was an arcade enthusiast and collector and that I was interested in dropping by to take a look at her Warlords. She asked if I would call back in the morning and talk to her husband. I agreed, gave her my name and let her know that I was very interested and would call at 10AM the next day.
The following day I make my phone call at 10AM and get a voicemail. The phone was going right to voicemail so I figured it was off. I left a message and went about my day. Around noon I get a phone call from the lady apologizing that she’d left her phone off by accident. After a brief discussion I got her address and setup a meeting at 2PM during my “lunch” at work. It was snowing pretty good that day, but at 2PM I drove over with cash in hand. When I knocked on the door I was met with a bit of a surprise… the house was in pretty bad shape. It was cold inside… almost as cold as it was outside… the floors had water all over (though no puddles)… and there was furniture pulled out from the wall at various location. It was then that I met the man of the house who explained that two nights prior their pipes had frozen… and evidently they ended up bursting at multiple locations. I could see that where he’d pulled out the furniture he’d also pulled down the drywall. The area behind the sink in the kitchen was pretty much down to the plumbing and framework. He’d been replacing pieces of plumbing. It was a mess. My initial “gut feeling” was that I was going to find a game with some water damage… however I was pleasantly surprised when I spotted the games sitting around the corner. I say games (as in more than one) because he also had an Asteroids Deluxe in the room as well that looked to be in pretty nice shape as well.
At first look the cabinet appeared to be in very nice shape. It was dusty for sure, but it was all there and the artwork appeared to be intact. There was no water damage to be found. It was then that he plugged the game in. At first the game wouldn’t power up. After a little discussion we plugged a lamp in to the socket and found that the socket wasn’t putting out power. We then found an extension cord and ran it to another socket in a different room. The game powered on. I expected that the black light in the back of the cabinet wasn’t going to work and I was right in my expectation. After a little more discussion with the seller I found out he had no idea there was supposed to be one back there and had no clue about the “castle” in the background. I asked if he had a flashlight so I could determine if the castle was still there and sure enough… it was. The game came up but it was quite blurry. He’d obviously done very little (if anything) to the game while he owned it. He said he picked both games up “a few years ago” and really didn’t do much with them. I would have inquired more about the Asteroids Deluxe but I had one already and really didn’t have the room… (side note – a local asked me to inquire about the AD a couple days later… the seller said his brother wanted the game but that if he didn’t he’d get in touch with me… he (thus far) hasn’t called me back on that). Being the … ahem … frugal (ie: cheap) bastard that I am, I asked how firm he was on the price. The guys response of “Well, I’ve had a half dozen calls about the game after you called so I’m pretty firm.” was met with a “Here’s $300” from me. At this time I looked outside and the snow coming down had gotten heavier. I asked if I could drop by the following morning and pick it up as the snow was supposed to stop by then. He had no problem with me picking the game up the next day… so with a “receipt” in hand I went home.
The next day turned out to be a much better day to pick up the game. While there was still snow on the ground, the fact that there wasn’t any snow falling made it possible to take care of business. It wasn’t too difficult to to load up in to the  Durango (I couldn’t use the trailer as it was covered in a foot of snow and was behind at least 25 feet of snowy ground). Upon loading it up though I did discover that there were no feet on the cabinet. Of the 4 places to put feet, 3 of them were missing T-Nuts. How the cabinet managed to survive in the condition it did without feet… I do not know. When i got it home I searched through my parts and only found two mounting brackets. I didn’t want to put T-Nuts back in so I figured I’d order some mounting brackets and add the feet later. I brought the game in the garagecade and just as I was going to lift it fully into the upright position the unthinkable happened. SOMEHOW I (for the first time ever) lost control of the hand truck and the game started to fall backwards! I did what any self-respecting arcade collector and enthusiast would do… I sacrificed my body to save the cabinet. All I can remember is that at some point during this “process” I gave up on the hand truck and went for the cabinet itself… to save it from a nasty fall. I, evidently, also threw my knee in to the mix to cushion the fall which resulted in a pretty darned nasty wound on the knee where the skin was rubbed off (by I assume the back edge of the cabinet) as I did everything in my power to prevent damage to the cabinet. The good news is that I managed to save the cabinet with ZERO damage to it. My knee took over a month to scab up and then heal. A darker area of scar tissue remains on my knee however. I considered it a “win” overall though.
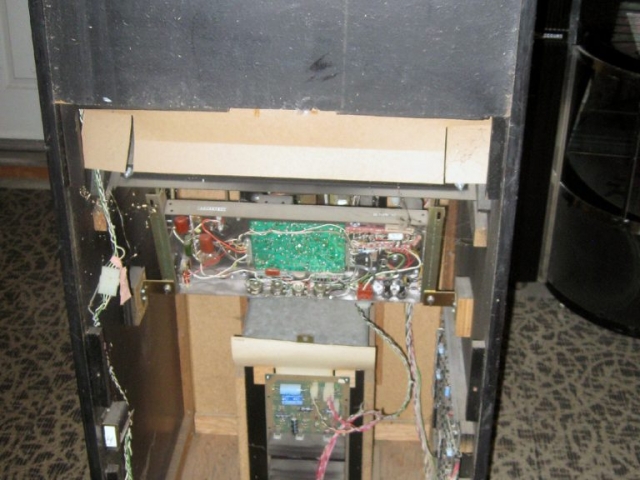
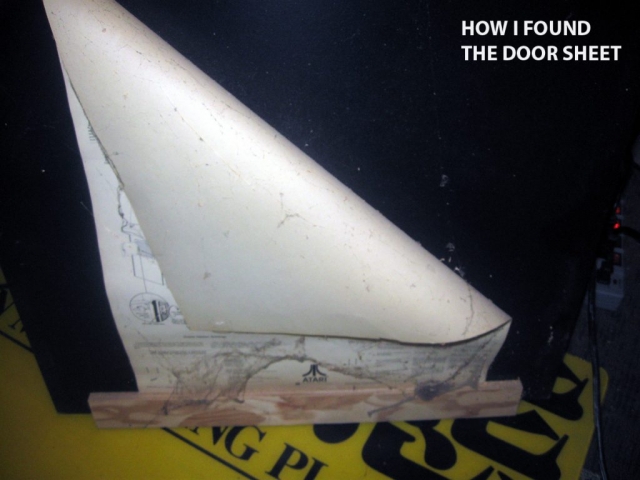
After patching up my knee I lifted the cabinet to it’s upright position and took a look at what I had. The first thing I did was plug it in to make sure I didn’t manage to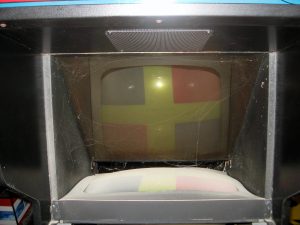 break anything. Sure enough, it came up just as it did back at the sellers house… very blurry. I unplugged and went about cleaning the cabinet it up… and BOY WAS IT DIRTY on the inside. It was quite obvious the inside of the machine hadn’t been cleaned… quite possibly… hell… quite likely… EVER. No, I am not kidding. I wouldn’t be a bit surprised if the dust/grime I cleaned up had been accumulating for 36 years. Take a look at some of the photos below and you’ll see what I mean. The back door sheet was still present (though hanging by one staple), and to my surprise, the original “bead ties” (I think that’s what it’s called) were still attached to the edge connectors. I can say for certain that no one had ever removed the PCB from this cabinet. After cleaning the back area and the monitor (which was especially filthy), I pulled the marquee lamp “drawer” and installed a new black light to the back lamp assembly. By the amount of dust on it too, there is a good chance that when the black light originally died, it too was never replaced. Upon firing up the cabinet at this point I noticed that I could BARELY see the castle scene in the background, even with the black light running. I powered down and pulled the half-
 silvered mirror which I found to be as filthy, if not more so, than the monitor itself. I also took the time to clean up the castle scene itself as I now had access to it from the front with the mirror removed. After re-installing and firing up the game again, I was greeted with an awesome looking background with blurry graphics overlaid. After a few tweaks of the monitor I was able to get the focus “almost perfect”… but not quite. It was at this point that I noticed that while the PCB was working, there were some graphical issues with the right side castles (red and blue). Part of the castle walls were showing up as letters, there were a small tweak or two in the “black knight” character image within, and a few of the characters of the normal text were coming up as the wrong characters. Dropping it in to test mode and asking a few questions on KLOV indicated that I had a RAM issue. Not only that, but the controls both were a bit wonky with the left position being much worse than the right position. After a few more posts on KLOV about that issue it was suggested that I try replacing the POKEY on the PCB. I ordered some 2101 RAM from a vendor who will remain anonymous (as they took nearly
 3 weeks to get the damn RAM to me even going so far as to lie about shipping them (I was born at night, but not last night)… had they been up-front and honest about their mistake rather than trying to blow smoke up my skirt, I’d have had no problem with them and would have likely even given them props for being honest and a link in this blog post). I also placed an order for some cam locks and feet mounting plates from Arcade Adventures (www.arcadeadventures.com). It was now time to clean up the outside of the cabinet.
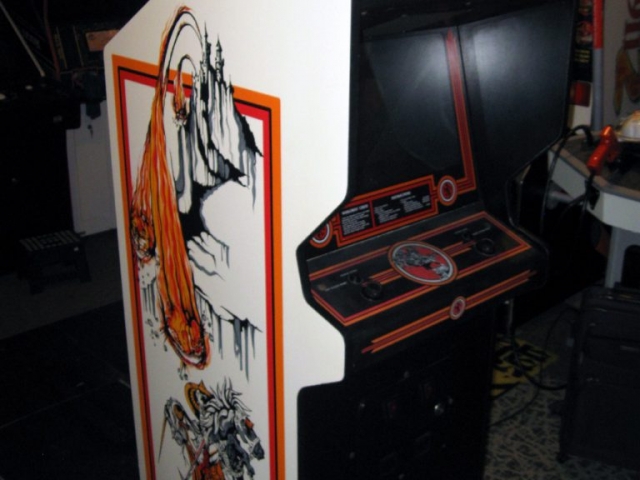
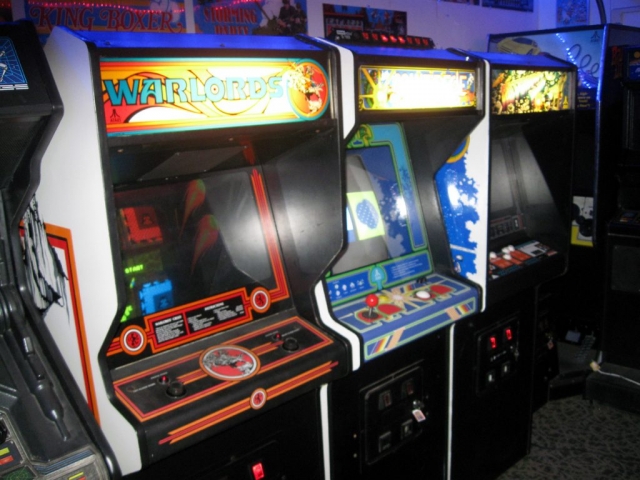
Using a magic eraser and a little water I was able to clean up the cabinet nicely. Even before the very minor “Sharpe” touch up I performed, the cabinet was in pretty much excellent shape. The left side was almost perfect while the right side did have a couple scrapes, but it ws easily B+ condition. There was zero water damage to speak of and amazingly there is no fraying at the bottom (even with it having no feet for who knows how long). This cabinet is one of the, if not the, nicest original cabinet I’ve owned. The only other cabinet that has come close is one of the Gauntlet Dark Legacy cabinets that I picked up a couple years back and that game is 20 years newer than this one. I am, frankly, astounded at the condition of this original cabinet. After about 15 minutes of touch-up the side art looked absolutely fantastic. The front of the cabinet is also in great shape and cleaned up well and the control panel cleaned up nicely as well and will not be needing any kind of replacement (thankfully, it’s always a chore to replace Atari control panel overlays).
 While waiting for the 2101 RAM to arrive from the (less than forthright) vendor I purchased them from, my order from Arcade Adventures arrived. I installed new locks both front and rear as well as feet brackets at all four corners (I removed the one remaining T-Nut). I also pulled a POKEY from an Asteroids Deluxe PCB I had on hand and replaced the one on the PCB (removing the PCB for the first time since it was installed back in 1980). Replacing the POKEY seemed to improve controls … a little .. I think. Both sides were still quite wonkey with the controls on the left abotu 80% working and the control on the right only working about 25% of the range of the pot… but the more I used the pots, the better they seemed to react. After using both sides to place a few games the controls on both sides improved tremendously. I suspect the POKEY that was in it was fine and that the problem was that the pots were just very dirty. Using the pots cleaned them up from use and as they cleaned up the controls got better. I was able to play multiple games even though there were RAM errors as the game played (mostly) fine… though I did notice that if I hit the two castles at the right side of the cabinet in certain spots where there was corruption evident, the castle would fall as if the fireball made it’s way inside the castle walls. After a few more games, the controls for both sides worked awesome. Now it came down to waiting for the RAM to arrive.
Originally, I had an offer from a fellow KLOVian (and friend) Gamefixer to take care of my PCB… a s I am a bit “hamfisted” when it comes de-soldering IC’s…even with my Hakko 808 I’ve managed to screw up more than one PCN in an attempt to remove an IC. I figured I could easily avoid that problem by shipping the PCB to him and let him handle the issues. I had no idea if the problem consisted of one RAM or all eight. I figured it wasn’t likely all 8 as the corruption was only evident on one side so realistically I figured I was looking at one up to a possible four RAM IC’s to have to de-solder. Again, because of the minimal corruption I figured there was a better chance at it being one RAM than all four but I wouldn’t be able to troubleshoot it until I got the 2101 RAM. I figured that once I get the RAM I’ll trouble shoot it by piggybacking the RAM to determine which one(s) were bad. If it was more than one or two RAM, I’d consider sending the PCB off to Gamefixer. If it was one or possibly two, I’d give it a go myself. It is infinitely more satisfying repairing ones own PCB than shipping it off to a pro, so I figured it was worth giving it a go. My confidence was increased when Gamefixer informed me that if I screwed things up he’d repair my screw up as well (thanks for the boost of confidence bro!). Finally, nearly 3 weeks after ordering them and 10 days or so after being todl they’d shipped (via 3 day priority mail), the RAM arrived. I’d picked up 10 IC’s figuring they’d be something I probably should have on hand in this
 hobby… to his credit, the vendor did send 12… that said, I still would have preferred the guy be honest with me rather than BS me, but I digress. The day the RAM arrived I set out to determine which RAM were bad. After piggybacking all 8 RAM, one at a time, I determined that a single RAM changed the behavior on-screen. While the other 7 did absolutely nothing, the 8th RAM seemed to improve the castle walls a bit. No, they weren’t perfect, but obviously this one RAM has issues so I figured I’d replace that one. With a bit of trepidation I dove on to removing the one IC. I clipped all all the legs of the IC, added a little solder to each then attempted to remove the solder with my 808… and the first 20 minutes I managed to remove 2 legs. I was feeling a bit dejected at this point. It was then that I figured I would try to de-solder from the PARTS side of the board since I’d already clipped the IC off. It was with a very large sense of relief that the legs started coming off quite easily using this method. After maybe another 10-15 minutes I had all the legs removed and all the holes empty. It was at this point that I realized that the sockets that I had on hand weren’t the right side. Sure, I had two type that had the right number of pins, but one was too thin and the other was too wide. Damn! I was hoping to add a socket to make swapping the IC in the future very easy. Unfortunately, since I didn’t have the right size socket it came down to whether I wanted to order the right size and wait another week or just solder the new RAM directly to the PCB.
  Yeah, I was too damn impatient to wait around another week (it had been nearly a month since I picked the cabinet up after all) so I soldered a new RAM IC directly to the PCB.
Now, when I slid the PCB back in to it’s home in the cabinet and plugged the edge connectors in I was hoping to at least see the improvements I’d noted while piggybacking on screen at power up. I was pleasantly surprised to see not only those improvements, but a PERFECT looking screen! That one RAM was the culprit and only that one RAM. The game now looked and played exactly as it should! SUCCESS! To say that I was relieved is an understatement. The feeling of accomplishment was through the roof. 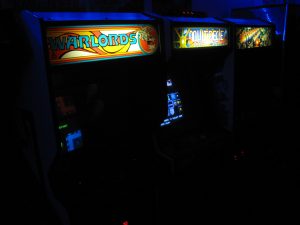 Perhaps I am not as “all thumbs” as I thought I was with the de-soldering iron. I then buttoned everything up nicely and set my eyes on trying to improve the monitor’s image. After some black-level adjustment as well as making sure the 95v pot was set correctly I managed to get the image to look ALMOST perfect. It’s still slightly out of focus, but not “bad” by any stretch. Also, it improves slightly as the monitor warms up. I’ve looked in to the circuit that handles the focus and got a tip or two from a couple of fellow KLOVians and plan on, one day soon, re-opening the game up and pulling the monitor to get it “perfect”. Until then, I’m happy with how it looks and plays right now. The onyl thing I’ve not been able to track down is a high score save kit. I know Mark Spaeth sells them from time to time but I’ve not been able to get the man to respond to any of my PM’s or emails asking if he has one for sale. I suspect he doesn’t have any built, but who knows. For now I am using my electronic high score board to keep track of scores.








First time seeing this Blog Jon! Awesome write up as usual. Rare piece if history.