Williams Multigame
Multigame Manufactured by Jrok
Manufactured by Williams Electronics, Inc. (c)1981, 1982, 1983
|
Condition When Purchased:
|
D
|
|
Current Condition:
|
A+
|
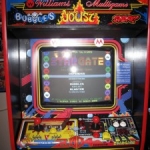
I was in the market for a Williams cabinet as I wanted to build a Williams Multigame cabinet. Jrok had just released his Williams Multigame PCB and I was on the list of those to receive one. It just so happens that a Williams cabinet came up locally. It came in the form of an Ataxx… and a pretty beat to crap one at that. The game DID work (and it's a fun game BTW), but the game isn't wha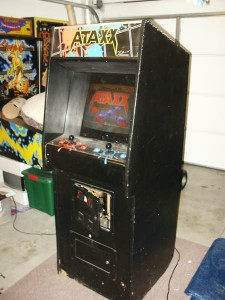 t I was after… the cabinet is what I was after. The cabinet the Ataxx was in was a converted Williams Stargate cabinet and it would be PERFECT to use for a Williams Multigame. Not only was it already converted… it already had a JAMMA harness in it as well and it just so happens the Jrok PCB uses the JAMMA standard.
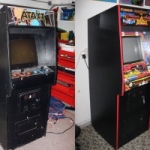
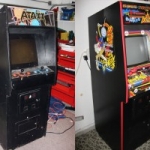
The cabinet itself was solid, but it had seen more than a few years of use. It had been painted black at some point, long long ago, as some of the black paint was wore and/or chipping off in places. The monitor was likely the original monitor in it… while it was decently bright, it had burn-in from multiple gams including the original game that was in the cabinet, Stargate. The original controls were long gone and in it's place were a couple of craptastic 8-way microswitch sticks. Of course the original marquee and bezel were nowhere to be found, instead it sported an Ataxx marquee and generic black bezel. The bottom left corner had some damage, though nothing too difficult to fix. The game also had some wear along the bottom where the plywood had been drug around for many many years. Basically I was going to need to strip this bad boy down to nothing and rebuild it from pretty much the ground up.
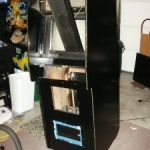
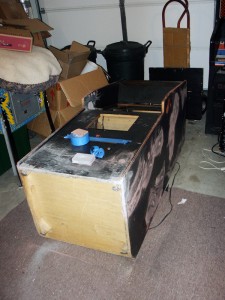 The first order of business was to sand/repair the areas that had damage, including the bottom left corner. Of course, before that could be accomplished I had to completely gut the cabinet leaving pretty much just the harness in place. The monitor, PCB, marquee, control panle, and coin door were removed. The next step was to sand and bondo the areas that needed help. The least favorite part of the restoration for me is sanding. Not only is sanding "not fun", it's also a mess which is a pain in the ass to clean up afterward. I am not sure what I detest more… sanding bondo or sanding paint. I think I pretty much despise sanding BOTH, but sometimes you gotta suck it up and just dive in. Luckily for me at the time I was working on this cabinet I had plenty of room to work.
After sanding, the next step was primer and paint. I always recommend using primer before painting. Not only does it it help with paint adhesion, it also provides a smoother base for the paint giving the final product a less textured look. Being this was a plywood cabinet, there was going to be so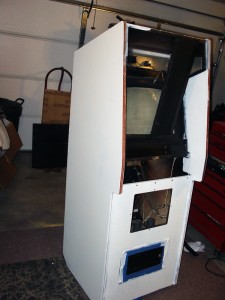 me texture no matter what though. After the primer came the paint. I use an oil-based paint when possible (black is easy to find in oil based). I also apply the paint with a fine foam roller. I'm not setup to be able to spray, so the next best thing is a fine foam roller. I've painted a number of cabinets that came out very nice with a foam roller. I tend to apply at least two coats, though I usually apply a third as well. The key to success when painting is PATIENCE. The photo to the right shows what the cabinet looked like after just one coat of paint.
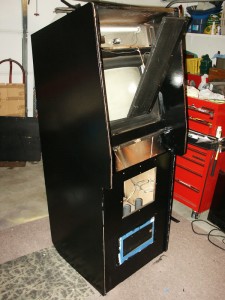 I let it dry for a day before applying the 2nd coat. I waited another full day before applying the third and final coat. I don't ever add a clear coat as I tend to prefer a Satin sheen and oftentimes a clear coat makes the sheen much too glossy.
The next step was to work on the control panel. I'd ordered some artwork from a place on ebay called "Artwork Doktor". WARNING – DO NOT EVER ORDER FROM ARTWORK DOKTOR … they are hacks. Their inkjet product is amateur garbage. If you want proof, look at the comparison shots of the side art I received from these guys below. That said, the control panel art they sent was "acceptable" (it was the ONLY acceptable art I received from them). When I stripped off the Ataxx control panel overlay I was met with… another generic "Fabtek" overlay. Under that overlay I found the worse swiss-cheese panel I'd ever come across. It's still the most hole-filled panel I've come across to this day. It was a mess. It already had some holes filled with bondo and others just just waiting for more 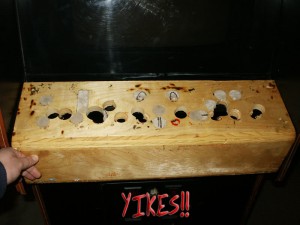 bondo. The original Stargate holes were filled but only god knows what other games (besides Ataxx) were housed in this cabinet over the years. My best count is 28 different holes (and I am not counting screw holes) were found on that panel. Twenty eight.
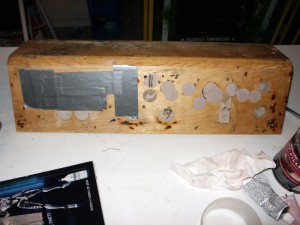 Undaunted I set forth to fill all the holes remaining so I could cut new fresh holes for the Williams Multigame. Using a technique I learned over time doing this I managed to do a serviceable job (essentially you want to cover the coles in duct tape on the TOP of the panel and fill with bondo TIGHTLY from the bottom. This cuts down on sanding time as you're left with a bit of a "dome" on the top side when you remove the duct tape rather than a bunch of extra bondo if you try to fill from the top). After filling the holes and letting the panel dry for plenty of time then sanding, I covered it with the control panel overlay and installed the sticks/buttons. At this point I only had standard Wico sticks to use a
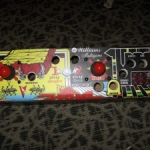
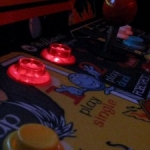
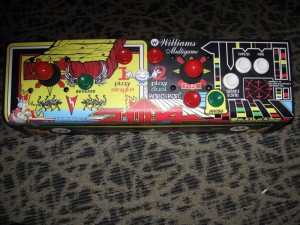 s I'd not been able to source 4" sticks. Overall the panel looked pretty darned good considering what it started as. It's pretty ironic that this panel was attached to the cabinet like this for less than two weeks before I managed to source not only an official metal "Phoenix Arcade" Williams Multigame panel, but one with artwork already installed AND included two 4" Wico joysticks. It's crazy how things like that work out. SO, off came this panel and on went the metal panel. I sold this panel to a fellow KLOVian to use on his Williams Multigame project.
It was about this time that my PROPER artwork arrived. It was official Phoenix Arcade side art, though from memory, I purchased it from a different source than Darin. I also ordered a customized version of the Williams Multicade bezel art that I created myself. I wanted the Joust platform from the control panel to extend in to the bezel and I didn't find any bezel art already created that included that so I made my own. I'm pretty sure I picked that up from www.gameongraphix.com (though it was named MAME Marquees at the time). I also received the red T-Molding I'd ordered from www..t-molding.com during this same week and installed it. The bezel looked great and the side art looked good as well. As for the side art, please take note that a PROPER set of Williams Multigame side art IS NOT the same art on each side. The ostrich should ALWAYS be facing forward meaning there are two distinct sides of art. I mention this because there are some HACKS out there selling Williams Mul
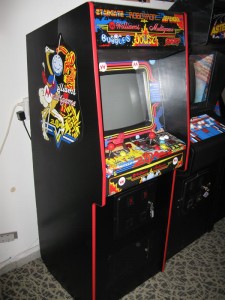 tigame side art with the exact same art for both sides which leaves the ostrich facing backwards on one side. That's NOT a full set and looks like crap in my opinion. The last thing to arrive was the Williams Multigame marquee. I can't remember where I sourced that from but it certainly could have been Phoenix Arcade since they were the ones who created it.
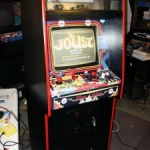
To finish up the game I installed a brand new Happ Vision Pro monitor I picked up locally (well, by brand new I mean it only had a few hours on it). I installed the Jrok Williams Multigame and fired it up. Success! The game plays amazing. The sticks are in awesome shape and the game looked brand new. I have since added a 2-in-1 switcher and I also run Jrok's Berzerk Multigame in the same cabinet which also plays awesome. If you're looking to build a Williams Multigame, look no further than Jrok's PCB. The same can be said for his Berzerk Multigame. Now if I could only figure out how in the heck to add the Mystar multigame to the cabinet I'd end up with a Jrok trifecta!
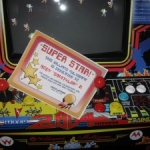
I would like to add that this game would NOT have been possible without the support of my good friend Savit4l8r. Without his financial contributions due to him betting with me against the Steelers, I would not have had the funds to purchase the Jrok PCB. You can find the certificate I produced to indicate my gratitude below in the additional photos section. Thanks again broham!!
More Photos:

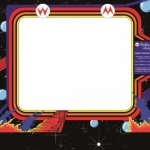





I actually did the bezel myself. Let me know what format you need it in and I can set something up. Shoot me your email via the contact page on this site.
Hi
Awesome, I am currently building one from scratch and looking for graphics. could you let me know how did you get the high resolution bezel for it? I found all other siteart and cpo , but bezel is not available.
Very nice. I love the idea of the 2-in-1 switcher in order to add Berzerk-Frenzy. My Williams multigame ran an ArcadeSD (not a great choice for Williams games as I’m sure you know) until I recently got my hands on a JROK Multi-WMS 2015. You’re right, it’s awesome. I’ve been having a lot of fun with it.